How to configure the product table view in the buyer experience
Table configuration section

- Open the OrderCentral app.
- Go to OrderCentral Configuration.
- Select the Product Table tab.
- Use the left list to pick available fields and move them to the selected list on the right.
- Click Save. A background deployment starts; a toast confirms when it completes.
Remove columns from product table
- The right column displays the fields that are currently being displayed as columns in the table.
- Select the fields that should be removed from the table and click the
 icon
icon - Click the Save button
Saving the configuration
It can take a while before the configuration is saved. When the save action is completed a notification will be displayed on the page.
Switch Component To Table View (Experience Builder)
- Go to the Experience Builder Site in the Salesforce Setup (Setup -> Experience Builder -> Sites)
- Open the page that displays the Product List
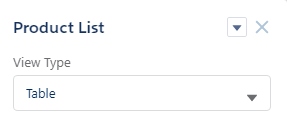
- Select the Product List component to see the configuration options
- In the View Type configuration select Table
- Publish changes by clicking the Publish button in right top corner of the builder page.
Override Columns Per Category
You can assign a specific Product Table field set per Web Category. This overrides the default configured above when shoppers browse that category.
Prerequisites:
- Define one or more Product Table field sets in the default Table Configuration (see above).
Steps:
- Go to the Web Categories tab and open the category you want to configure.
- On the Web Category record page, locate the Shop Configuration card (component Web Category Configuration).
- Click Edit.
- In the Product Table picker, choose the field set to use for this category.
- Optionally, select a Product Filter set for this category as well.
- Click Save.
Behavior:
- If a Product Table is selected on the category, it takes precedence over the default.
- If the category selection is cleared or not set, the default Product Table is used.
Tips:
- After saving, allow a short time for the configuration to deploy before reloading the storefront.
- Ensure the Product List component’s View Type is Table for the category pages where you expect the table view.